Blog

Noorullah Ahmadzai
August, 28th 2021 - 10 min read
Git
GitHub
Authentication
HTTPS
SSH
Back in December 2020, GitHub announced, it will no longer accept passwords to perform git operations starting August 13th, 2021. What does it mean for you as a developer?
Developers won't be able to do Git operations with GitHub,
pushing or pulling the code included using passwords. Previously we had to type our
username and our password to let GitHub recognize us and let us do all kinds of git
operations from the terminal. After August 2021, It is deprecated and we will see
the following error/feedback message.
Support for password authentication was removed on August 13, 2021. Please use a personal
access token instead. remote: Please see
https://github.blog/2020-12-15-token-authentication-requirements-for-git-operations/
for more information.
Why GitHub Deprecated Password for Git Operations?
Security, Security, and Security. When we used to do git operations, we had to provide our GitHub username and password. The same password could be used to login into the GitHub account, create, delete and update repositories. If our GitHub username and password were accessed by a Hackers. They could do operations that can not be reversed unless we reach out to GitHub like deleting a repository.
Imagine if you're password is leaked and you are the maintainer of a project that is used by thousands of people. It is like losing a community you worked so hard for, for many years is now lost in a few seconds. Or you are working on a secret project for a company that will be launched soon and someone deletes everything, including your account? The horror list just keeps going on and on.
These are some of the main issues why GitHub brought up the necessary changes to address these problems and reduce the damage even if the inevitable things happen. Remember:
Nothing is perfectly secure on the web but we can drastically reduce the chances of getting into serious problems.
There are two ways to Git Operation with GitHub using HTTPS and SSH?
Personal Access Tokens (HTTPS): If you are using HTTPS (Clone with HTTPS selected) to manage git operations, you must generate a token in your GitHub account settings, and You can paste your Personal Access Token instead of your password. It will successfully perform the git operations and you won't see any error message unless your token is expired or invalid.
How do I generate Personal Access Token?
First, Sign in to your GitHub Account
Then go to Settings.
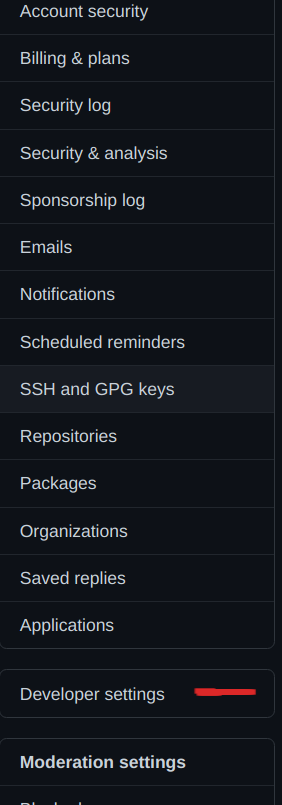
Then go to Developer Settings.
Then go to Personal Access Tokens and click Generate New Token.
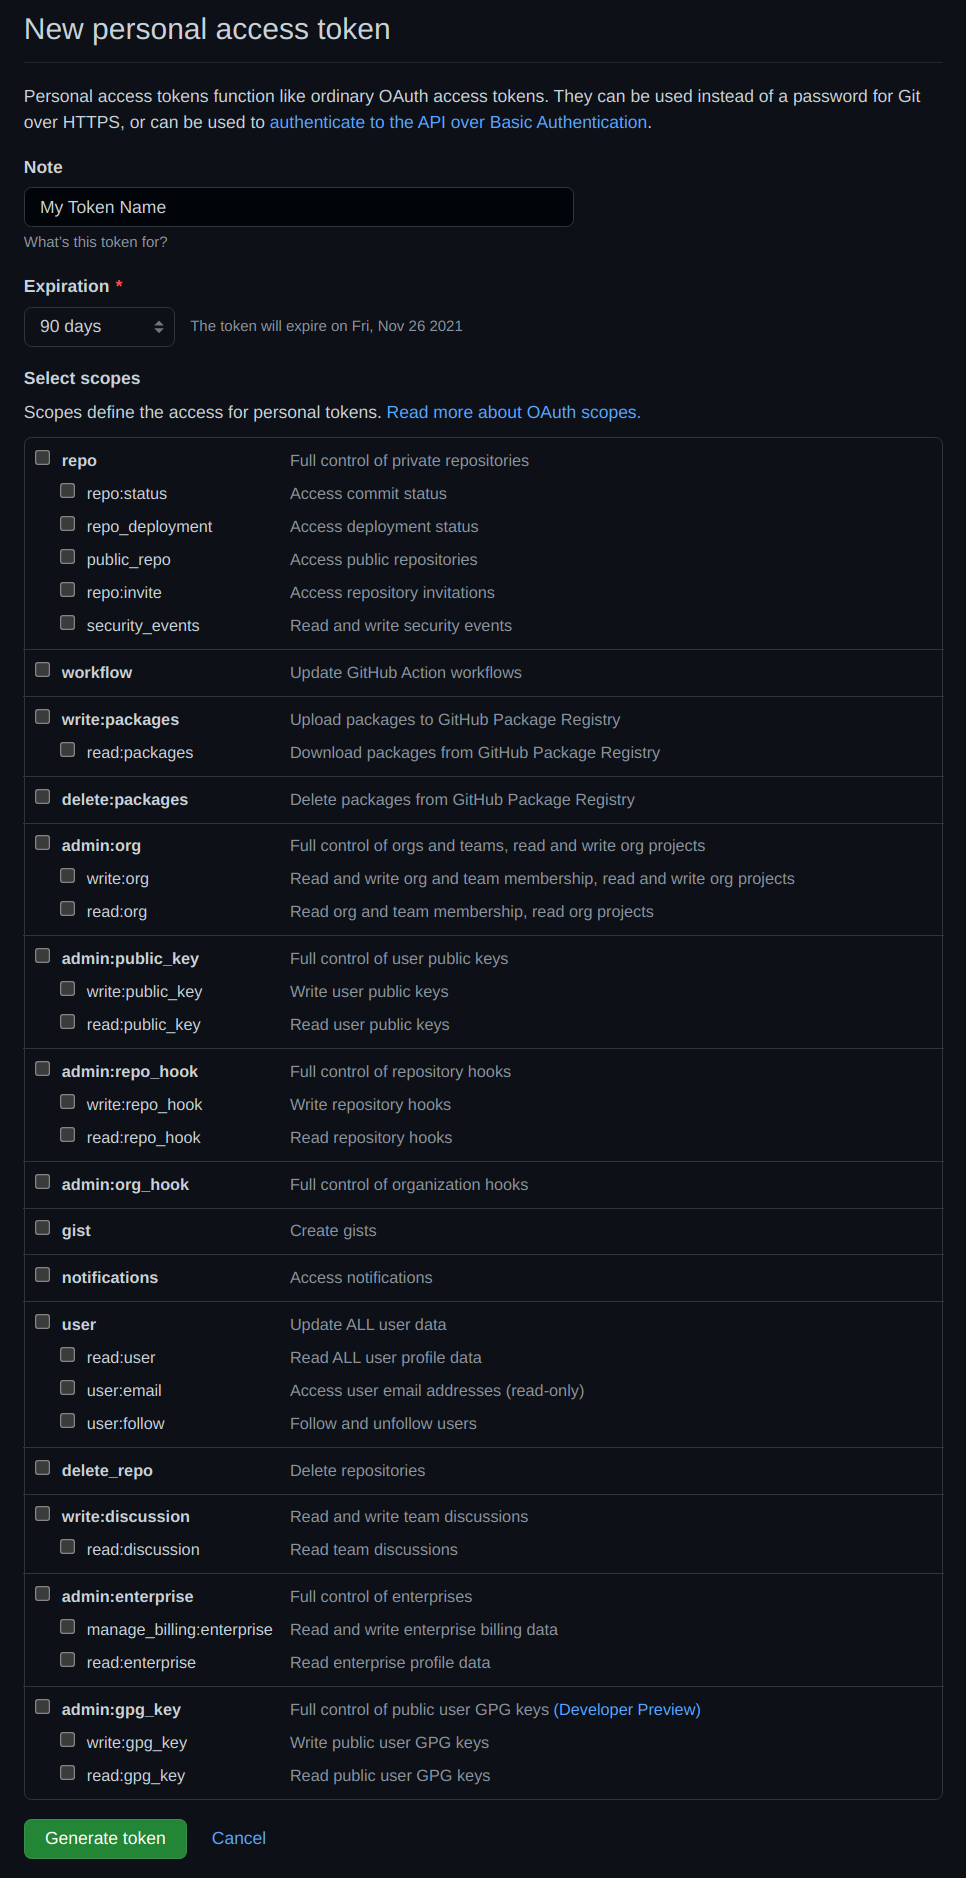
Once you clicked it, You will see this page.
Here you can name your token and provide a time when the token should be expired. Temporary tokens are recommended for better security. Then check what operations should be allowed using this token and hit
Generate tokenbutton.This is how you're token will look like. For security purposes, you can copy it only once from GitHub and it will be never shown to you again. Make sure you keep it secure and do not share it with anyone. Sharing a Personal Access Token is like sharing your password.
If you don't know where you stored your token, you can immediately delete all of your tokens from GitHub and generate a new one instead.
Personal Access Tokens are better than Passwords for git operations and it has many benefits such as:
Uniqueness: Every token can be generated for a unique device that let us track where the access to the system was granted.
Revocable: You can delete a token from your GitHub settings in case if it's leaked and do quick damage control. Tokens are revokable but passwords are not. They can only be changed.
Limited: Tokens can be scoped, Meaning that when you generate a token, GitHub will ask you what operation that token will be able to do. This way you can manage how much access should be given to a token.
Random: Unlike passwords that are a few words. Tokens are longer compared to passwords and they are randomly generated. Hackers can not guess what the token will look like. GitHub will use a secure algorithm to randomly generate all the tokens that provide many times better security compared to passwords.
Temporary: It is recommended by GitHub to generate tokens with a limited time like 7 days, 30 days, or 90 days, after that time. the token will be automatically marked as invalid. We can also generate a token to never expire and it is just as scary and the passwords themselves which is not recommended but we can do that if we want to.
Secure Socket Shell (SSH): SSH is a cryptographic network protocol for operating network services securely in an insecure environment. In simple words, when two computers want to exchange information. Hackers can sit between those computers and steal important information. SSH provides a secure connection using cryptography to log into or contact a remote computer.
To use SSH with GitHub, First, we need to generate a set of keys. On Mac or Linux we can run the following command in our terminal to generate the keys. If you are on Windows, You can use WSL
ssh-keygen -t rsassh-keygencommand is used to generate the keys and-tflag is used to specify which algorithm should be used to generate the keys. In this case, the name of the algorithm isrsaFor more information about RSA AlgorithmOutput:
Generating public/private rsa key pair.
Enter file in which to save the key (/home/username/.ssh/id_rsa):
Enter file in which to save the key (/home/username/.ssh/id_rsa.pub):
The system will ask where to save both the private and public keys. The default location is located:
/home/your_user_name_goes_here/.ssh/id_rsa
/home/your_user_name_goes_here/.ssh/id_rsa.pub
Enter passphrase (empty for no passphrase): Enter same passphrase again:In this stage you can choose a passphrase or password, highly recommended for extra security but you can leave it empty as well. Once you hit enter
A random image will be printed to the console along with other details like this
+---[RSA 3072]----+
|             . -*|
|             .B*X|
|           . =G==|
|            o.++ |
|        S..  +   |
|       + oo +    |
|      o = .o F . |
|     . o *..B =  |
|     .o.o +o.*.  |
+----[SHA256]-----+
At this stage, you have successfully managed to generate a public and private key.
- Private Key: The private key always stays on your computer and should never be shared with anyone, this is how it looks like:
-----BEGIN RSA PRIVATE KEY----- MIIJKQIBAAKCAgEAthDE1vUzXDq5HD8Qq6anS3adQ57in68+AWuXhw sjjQOchuUeob28jzdPP98uFHCEDfKIXC6eCoYjXB59SpucNfvm3sab WWcjq8fsWtZdo6qmVPjMz7Scc0Ne54Vg9EGXVxcmZczc30k2rUf3Kx 9zUec6vtT1hb34vfV3xsMb2UbpIhmAV2lrL44aMtP3q7OfFR4Y79UI tXWFh3I1gNUH8kp6zzSosg9FsCT9dIlJL4i4pQh8Nrf/F01YoJbjNo b74G4nMdRkkxGHowKgum9c+ZN1P9CvZGTJ6rdq8DIitWx+a/zf3/Mf imSQd2w5eXzCyd35vopM9YfZEwfX2nuPGPBnzb+hSreEw52sLh0Fzt kG+VgwZQRM4BdTFKEg5E8hOGFSroi2ceVtqBQvxQM0jo8OZdyavMtu hw0vUl9XbdfbyqprYyT9p9FYHMtWAp5owB5WCPgO9Z5WqvDkzuWKr7 ogAIkHUeaw+X0dd8oOkX07sPd3ssSpgHsRUqOg5Cl6backBzWOCDRq Zg0IqUE2Ilm/+aYydhVW5+0UnhZF8rp9DHzwVCJsxpdmbrgTt/TR/O ms8yu+cMlbdORix/6X79wOOQ9Oevt3vpWssQMGH73bOYvG8u3W9Ct3 s/avum6Js/NkyRm9TZ4dVDOMinsaA0a3Bua2JIyCnW9EmaTiCDkCAw EAAQKCAgEAhbxTmsKKc5j/GGyKxkuoX5pFcsJnHX0QQuLRb3UTLCYW +E+c7Jn+xASQxg4ePw1XMxeQaoYjuP9HQgdzaTZczJq4v7OLsWQ9o5 U7XI5SQkK7419NMtUshs5aDB7BVSpJDMQIhIazR6Dz9N0EBj0X7HW5 hSvRHeipqn+A+BOhhTy9SzsINy1MeqYbQHLLXuiWVmDBWIpX11L4Ps H54ySYrbVf+IxpzkHBot3I/61IgQ4g87kD5P3K90btbyjmxcrpgbXo PIYTSqR5yZfIkKn01a8nVTTpYQlX+H26o61wKWwEgTZDDLH93R55r/ 9jSIYIX1gad4gHd+PN5FjCic5xEVd6IaZMjeOy0OkPEfm1ZQVuz0Sw SotFagx27DyU8brMVpkcyARmxdzrfgql1RTAbRHDU40qZF4//zoH9x 3WE6fEpEYnbkI5DtR1zGJRC2Tpt8PfpZBtGsuWzacqiCKv3VKu3FXt KFQdM3PQ5wtDOLnMBDHAyR5pacV2+J29FwtQlSDmjXGL76FA9TRd8q P3l2VpPY9wGxll8EkzKhf8yaVXkFxRfZnbodXECxHWxLzpp2jOpSHD pg1eEh2wL097h8FmlHhP5P8jklI2i7peEh5d1tDtOvlVYQaiuxnqsT 3lrUV/rlMOq7pRVFs2IcriN72DoJMA4QDE1f2PeRXCwXECggEBANjp sm3QewPwGjWHtYr9i1eqgth8p4Y3fFaXtOffgmPWSIWjr8shGZXOik eYWHSBpdj8KB33WeJn/Jhzsug014wziiF2Mg3tgnq1R9QIQQ4AZIvj XdYT6O9oI3zK7tXCgGM47OqgjF0cPpojj21ZML2m4Tp/6cvcWMm31S eJjk2uuQLegl7yGhhJjdTrwRQPyQYNDGXHoFcZMYvYnkQ8BLIBL21i S4xs2cUFxM3cSCekwJVXSy1/6UmmoWZ8LaKxGi+28X82ltkt7TuE2c sQPMRnQg60oBnhyvMOE+DywmO0q0aJi6AHUEt7rVrqfpQHRHuXeAEy zrCFZvYK5HZbWcCggEBANbfi2VPShhcPz4RZVDW0I+90V9ZzyvZVXL Uz4c4ExwjKQgUpB+ou6uWifeBmCuWOfYDqW9kCwSGsVa+zhbb/Rxf+ MmThL2GqxmCM22Cke9LxtKDc9T1w4BhIzWrtVZiBdM7cXfftid8Vtk Hwy8144QflLRptCABj0u32n67x23qmxvpRXHCm/ZVrZns7uBtmegco 4iPmlBuUb9D7F/6bmafDEh4U0jk9C1XI/+xw7ZiArJ76H3GezOYC5w tk+tR1Id8YbA15FXviJ76myLlYKdQSOSMIQmr8pdg7YdpTJx9gosfv SzD0J30PlBNDizQKymouhEYEQr1F5WrTjluV8CggEAPpFqfnKciU5A wSAcJbNs9iShCYErcXOf0fqAnEHEgrfUw3erxZQOpT+mc3BmU3TyOd zCVaJ7sur72Z3GBWT4p+BV/8DwP0Q7Vtnjli2rVjaWyiMTdiTYE/ae Bekja1VnYzeQXz1gP5teE2gefxQzEwGIBi/PaJZupgD44yayfYXgqA s239xF2quc1cYLM5Y6DhzFbrZeccE6oXQictw9HntpCsxHroHXbxVy 506bIZRMWMeNT9qNmEkQVVeMcllTjF/g2SkN6idtPrXbfjZPpc121m DhR1iVjPSjaYxCjMc9zeC1EsSxq5NsP7iGl0V0nS98tJmtZY2GXiXE q5VkEQKCAQBcVV9PP401fp5mi48f989TlVvdP3h4/UFswOoUzxHXN6 173XLRb+6FQ4Ex7Gx5fmqVvukWRsU9Qqv9/KwOwqW3hb4g0NVfo/ju UzbKPit7yvI7D+W8g4dpKVS6AXlBD4o1RPvzaRybRyECzgUfymZkJj X+eNXAUytCfFTV1NdT8laI3erLgbcHWbXpyRi1NCPIzFWxnxPOsDlM mWF/tNuwGXRrx9jyIACVYzbC756MRv2luP0k3x+eAh4rFKLVoipTti 08TUw7aV0qA8Kacjrgau2H2Hdx8oOibTJk1+jl7kEki5T9IYAKACSu 2Q3YT/PcSPb71X2tWbiyxhQtNa9AoIBAQCgC1GcaqyRkUWqJEFnHbJ 6rmIk2jiCjbaEqFLtAMXCvMDzlMzCrrgPku4BFCNdtQ/nuv1hqd32J tkvS6ACx5mEIAg8QLGv9frcWzGM707ckMdKNsCAuB9icq34PStgkjK fAdjJW4o+CGYWlsGdpVXYoZIsJeRYfGazyqWlEXWAt9M0cBsjvZJDh OzqCNtYqFLuowEJBDnMPG5K/9o08FksLGBYHVYXeZQBZW2rXBpmok9 o3BhCMNlQsw5FbOHL/xKE35IDVpnwJDWgKK8mZ4VS4fYw/tN1CiQX5 9hwjwmxn55I92cpNW0ExexwOlXeJ0ryBvUCKYszcnNsgEV4tCXH -----END RSA PRIVATE KEY------ Public Key: The public key is added to your GitHub account and this is how it looks like:
ssh-rsa AAAA3NzaC1yc2EAAAADAQABAAACAQC2EMTW9TNcOrkcDiw
CrpqdLdp1DnuKfrz4Ba5eHCyONA5yG5R6hvbyPN08/3y4UcIQN8ohc
Lp4KhiNcHn1Km5w1++bexptZZyOrx+xa1l2jqqZU2MzPtJxzQ17nhW
D0QZdXFyZlzNzfSTatR/crH3NR5zq+1PWFvfi99XfGwxvZRukiGYBX
aWsvjhoy0/ers58HHhjv1Qi1dYWHcjWA1QfySnrPNKiyD0WwJP10iU
kviLilCHw2t/8XTVigluM2hvvgbicx1GSTEYejAqC6b1z5k3U/0K9k
ZMnqt2rwMiK1bH5r/N/f8x+KZJB3bDl5fMLJ3fm+ikz1h9kTB9fae4
8Y8GfNv6FKt4TDnawuHQXO2Qb5WDBlBEzgF1MUoSDkTyE4YVKuiLZx
5W2oFC/FAzSOjw5l3Jq8y26HDS9SX1dt19vKqmtjJP2n0Vgcy1YCnm
jAHlYI+A71nlaq8OTO5YqvuiAAiQdR5rD5fR13yg6Q7Tuw93eyxKmA
exFSo6DkKXptpyQHNY4INGpmDQipQTYiWb/5pjJ2FVbn7RSeFkXyun
0MfPBUImzGl2ZuuBO39NH86azzK75wyVt05GLH/pfv3A45D056+3e+
layxAwYfvds5i8by7db0K3ez9q+6bomz82TJGb1Nnh1UM4yKexoDRr
cG5rYkjIKdb0SZpOIIOQ==noorullah@linux
Next we have to go to
.sshfolder and openid_rsa.pubfile and copy the key. If you can't see the folder, It's because it's hidden by default. Here is the path to the folder whereid_rsa.pubfile is located./home/your_user_name_goes_here/.sshOr we can type this command to print the public key to the terminal.
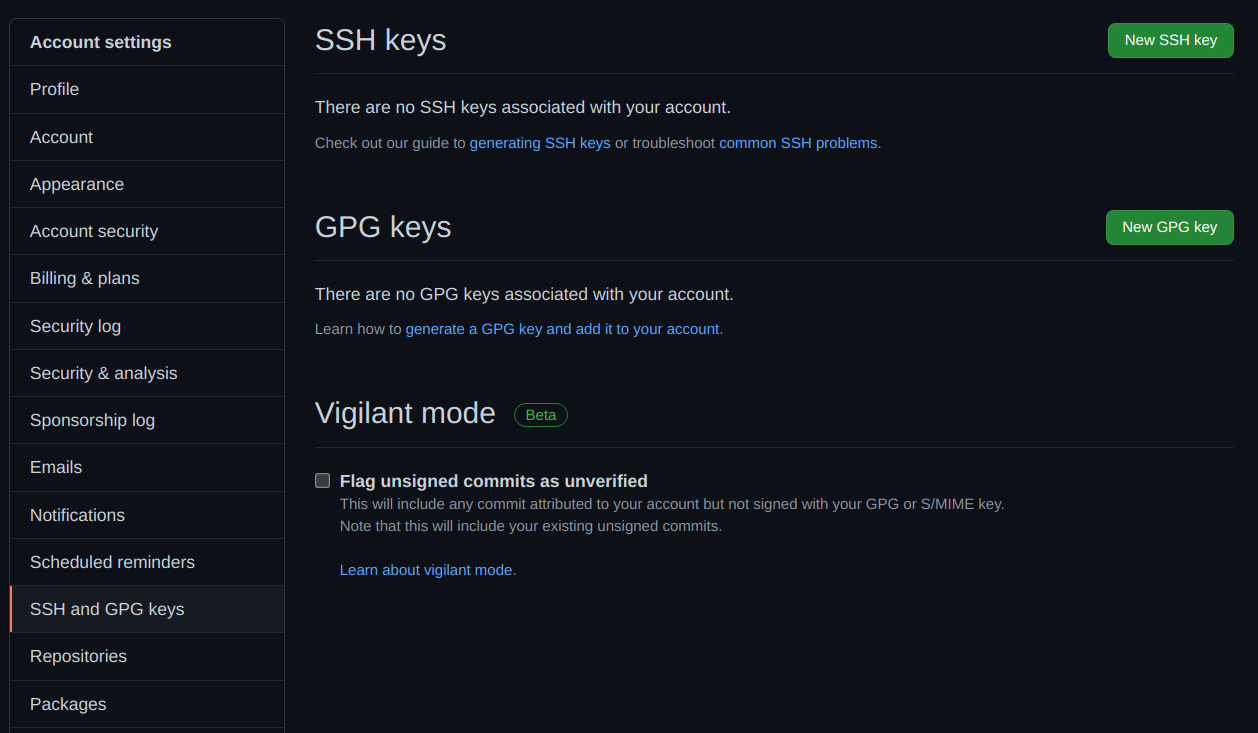
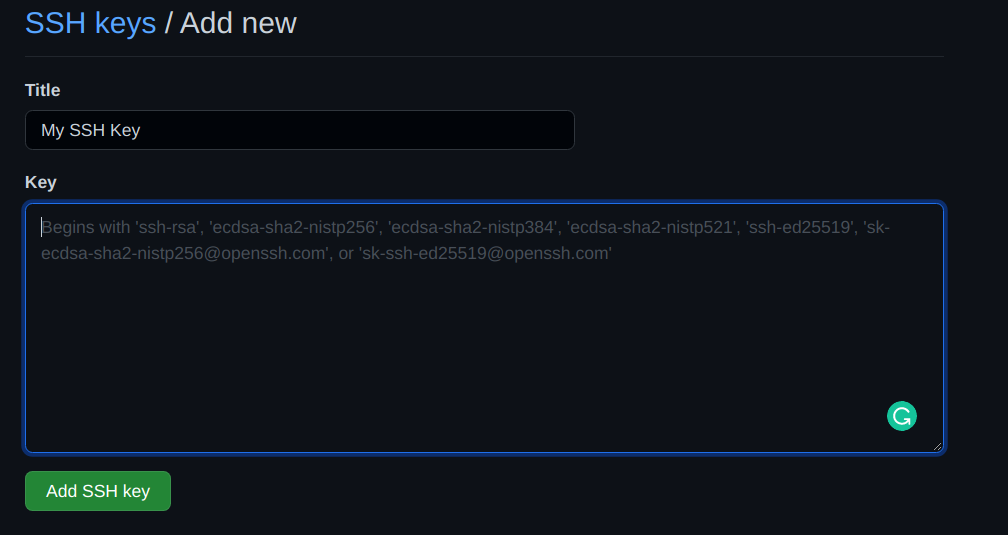
cat /home/your_user_name_goes_here/.ssh/id_rsa.pubYou will see your public key on your terminal, copy all of it and go to your GitHub account settings. Select
SSH and GPG keysClick
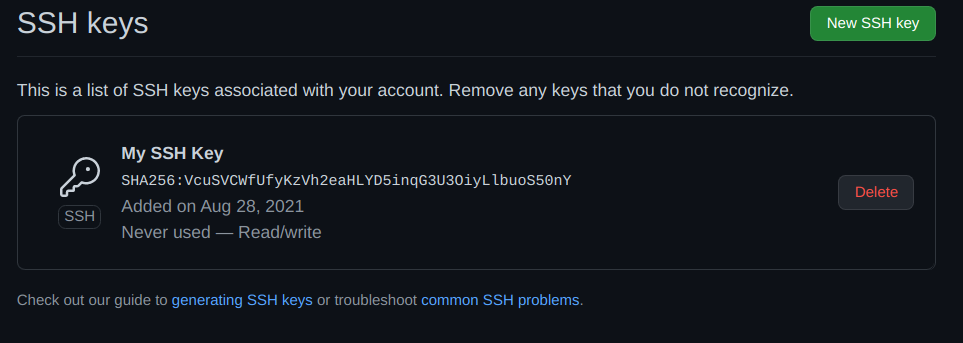
New SSH-KeyTitlefield is used to name your key. Feel free to choose whatever name you like and then in theKeyfield, paste your public key and clickAdd SSH keybutton. If things went well, this is how it looks like!If you notice, the Key icon is gray, and it also says,
Never used. Let's use SSH to see if our setup is working or not.Go to your favorite private repository you own and then click
CodeMake sure you have selected
SSH. NotHTTPsorGitHub CLIand then click the copy button.Go to your terminal and type
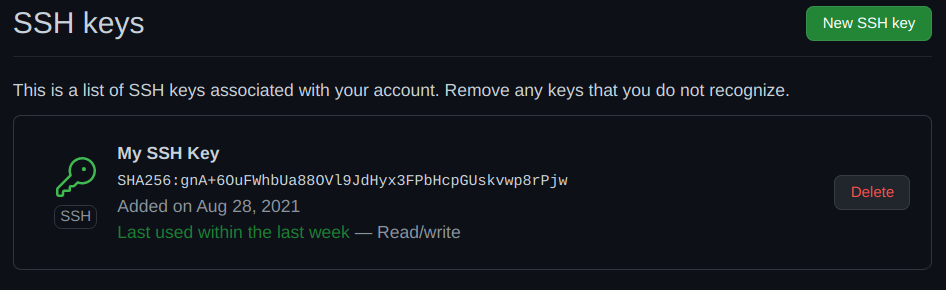
git clonehit space and paste the command you just copied like this.git clone git@github.com:Noorullah-Ahmadzai/noorullah.dev.gitIf the clone went well, This is how the SSH-Key should look like once you refresh the page.
Yeaaaaah! The color of the key is green now and the text shows it was recently used. This means our SSH configuration was successful.
Behind the scene when we do git operations. Git will establish communication over SSH with GitHub and check if these two computers can communicate. If Yes, The operations will be carried out without asking you for passwords or tokens. It's completely automatic.
There is also GitHub CLI which was recently introduced by GitHub.


Note: Passwords do and will continue to be used for loging into your GitHub account on the web or mobile apps but it will no longer work for git operations such as Pushing or Pulling the code because we do git operations more frequently and submitting our password for each git operation is just too risky but we login into our account on the web once in a while and stay logged longer time before we type our password again.
Conclusion
Love it or hate it. GitHub and all other websites around the world encourage their users to help them secure their users' accounts. GitHub provides 2 great methods for all git operations and as developers, we need to have the necessary precaution in place to avoid unauthorized access to our accounts.
Using Personal Access Tokens or Secure Socket Shell (SSH) We can drastically improve the security of our GitHub Accounts.
I enjoy using SSH which automatically handles authentication and security behind the scene with no effort except the initial setup that takes less than a minute. Hope you enjoyed the article. Let me know what you think on social media.
About the Author
Noorullah Ahmadzai is a Software Engineer, Web Developer, Writer and Bachelor of Computer Science. He is passionate about building quality software.